

55printing Guideline Templates: Bleed, Trim, and Safe Zone
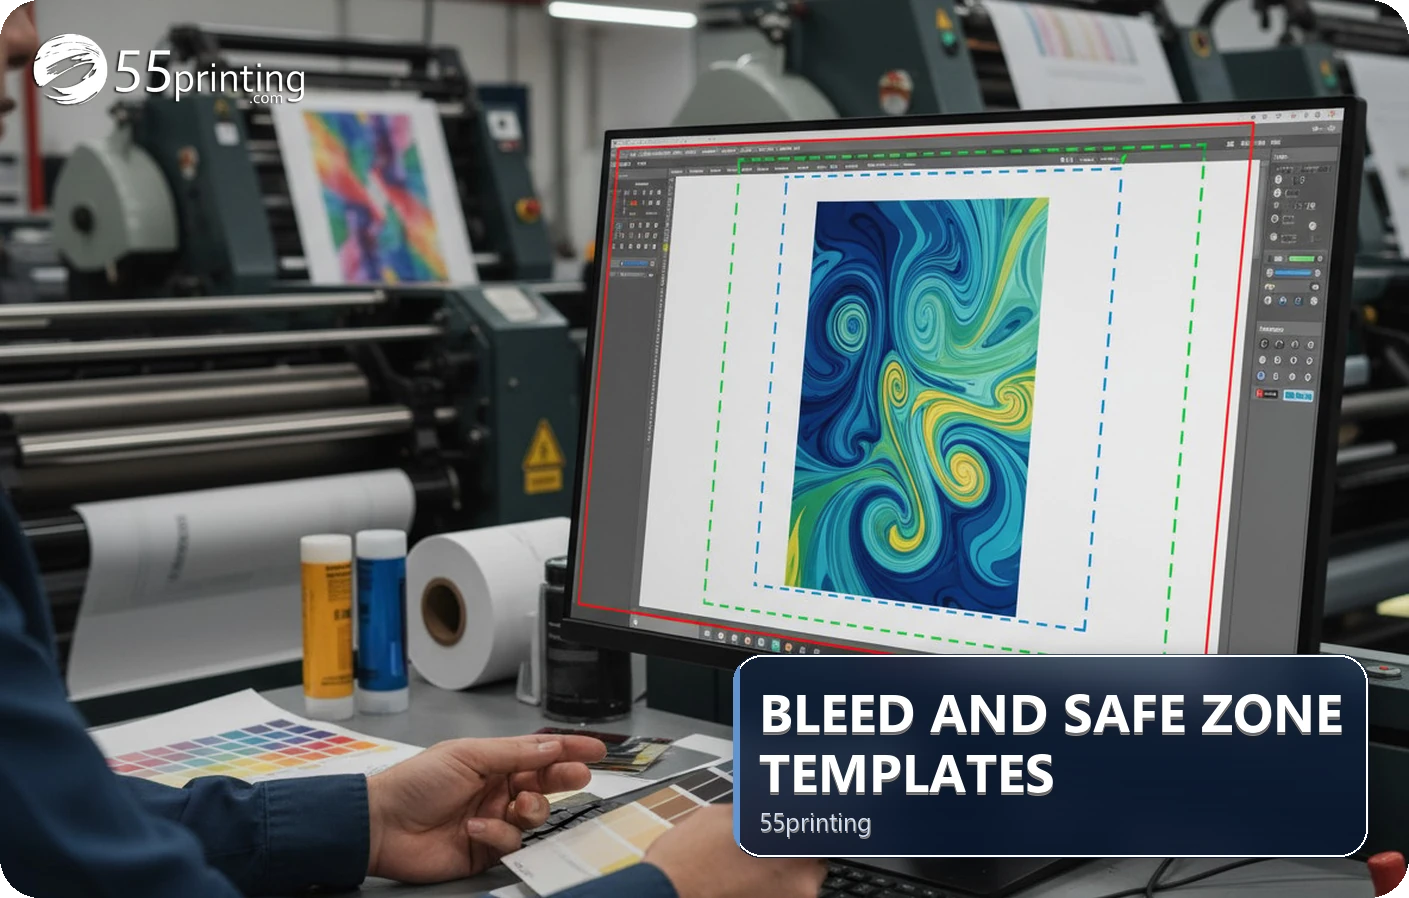
Download the 55printing guideline template that matches the exact product and finished size. Keep background artwork through the bleed, keep text and logos inside the safe zone, and treat the trim line as the cutting boundary. Do not stretch one template into another size. After design, inspect the export and use a proof before approval.
A template is a measurement aid, not decoration. It tells you which area will be trimmed, which background must continue beyond that cut, and which content needs extra distance from the edge. The 55printing guideline template hub is the right starting point when product size or setup is not settled. Once the artwork is complete, the template still needs an export check and a proof review.
What do bleed, trim, and safe zone mean?
Bleed is the extra artwork outside the finished cut. A background color or photo that should reach the edge continues through this area so a small cutting shift does not leave an unintended white strip. Trim is the intended cutting boundary and the finished-size reference. Safe zone is the inner area where important text, logos, faces, and contact details have enough distance from the cut.
The three boundaries serve different purposes. Bleed protects edge coverage. Trim defines the product. Safe zone protects meaning. They are not interchangeable lines, and moving text into the bleed because it looks visually centered can place that text too close to the cutter.
- Extend background artwork through the bleed.
- Use trim to judge the finished dimensions.
- Keep critical details inside the safe zone.
- Hide or lock guide layers only after checking that the artwork follows them.
How do you choose the right template?
Choose the product category first, then select the exact finished size and orientation. A postcard template is not a substitute for an envelope file because the folds, panels, and safe areas differ. A business card file should not be enlarged into a flyer canvas, even if the design appears simple.
Use the full download for the chosen item rather than treating a thumbnail preview as the working file. Keep a note of the product, size, sides, and software you will use. If the product configuration changes, return to the hub and download the matching template again instead of resizing the old document.
| Question | Correct action | Reason |
|---|---|---|
| What will be printed? | Select the exact product category. | Products can have different trim and panel rules. |
| What finished size is needed? | Choose the matching dimensions and orientation. | A changed canvas alters placement and edge coverage. |
| Does the item fold? | Use the file made for that fold or panel layout. | Fold positions and safe areas are product-specific. |
| Is the file a preview? | Download the full template before designing. | A thumbnail is a visual reference, not the working guide. |
| Did the product change? | Start from the new matching template. | Stretching carries old measurements into the new job. |
How should artwork be placed on the template?
Place the background first and extend it beyond the trim into the bleed. Add photos, color blocks, and patterns that can tolerate the edge area. Then place text, logos, QR codes, phone numbers, and faces inside the safe zone. Zoom out to check balance, then zoom in to inspect small type and thin lines near the boundary.
Keep guide layers separate from artwork when the software allows it. Name the front and back clearly. For a folded item, confirm panel order and fold direction before the design is final. A correct-looking front can still fail the handoff if the reverse side or panel order is unclear.
What changes between Canva and desktop design software?
The measurement rule does not change with the software. In Illustrator, Photoshop, and InDesign, keep the template guides available while building and export the artwork with the required edge coverage. In Canva, set the document to the selected finished size, use the supplied margin information, extend backgrounds when the product requires it, and inspect the downloaded PDF rather than trusting the editor view alone.
Online Designer is a separate browser route for creating a design. If you choose it, confirm the account access and selected product before beginning. The tool choice does not remove the need to check final dimensions, readable type, page order, and the proof.
- Illustrator: keep guide and artwork layers distinct.
- Photoshop: inspect raster detail at the intended print size.
- InDesign: review preflight, links, and page order.
- Canva: verify the exported PDF dimensions and edge coverage.
What should you check after the template is hidden?
Export the file in the format requested for the product, then inspect the export instead of the editable document. Confirm the finished page size, orientation, page count, bleed coverage, safe-zone distance, text, logos, image quality, and panel order. Open the file on a second screen or at a different zoom if a small edge detail is hard to judge.
- Confirm the filename identifies the product and version.
- Check page size and orientation in the exported file.
- Confirm background coverage beyond trim where needed.
- Check that important content is not in the cut area.
- Review every page, side, fold, or panel.
- Upload the intended file and read the proof before approval.
The free PDF proof is the next review path when you want to compare the proposed result with the artwork and product details. If the proof reveals a problem, return to the source document and correct the cause rather than shifting content on top of a final export.
How does the method work for different products?
4 x 6 postcard with a full background
Select the matching postcard size, run the background through the bleed, keep the address or offer inside the safe zone, and inspect both sides. Read the proof for crop and text placement before approval.
Envelope with folds and panels
Choose the envelope template, keep flap and fold areas clear according to the supplied guide, and confirm which panel carries each mark. A postcard layout cannot show the envelope geometry.
Flyer rebuilt from an old card design
Download the flyer template and rebuild the canvas. Do not stretch the business-card file. Recheck type scale, image resolution, bleed, and safe zone because a larger product changes the reading distance.
Questions customers ask
What is bleed in a print template?
Bleed is the extra artwork beyond the intended trim boundary. Background colors, photos, and patterns that should reach the finished edge continue through that area. Bleed helps protect edge coverage after cutting, but it is not the place for phone numbers, logos, or other critical content.
What is the safe zone?
The safe zone is the inner area where important content should sit away from the cut. Keep headlines, contact details, logos, faces, and codes inside it unless the product instructions say otherwise. The safe zone protects meaning when a small trim variation occurs.
How do I select a 55printing template?
Open the Guideline Templates Hub, choose the product category, then choose the exact finished size and orientation. Download the full working file for that item. If the product or size changes, download a new matching template instead of resizing the previous document.
Can I use a template in Canva?
Yes, if the selected product and size are supported by your Canva setup. Keep the finished dimensions correct, follow the supplied bleed and safe-zone guidance, and inspect the exported PDF. The editor view alone is not enough to confirm the final page size or edge coverage.
Should I keep template guides in the export?
Follow the file instructions for the selected product, but inspect the final export as a customer would see it. Guide lines are measurement aids and should not appear as accidental artwork. Before upload, verify that the intended design reaches the bleed and that critical content remains in the safe zone.
Can I stretch one template into another size?
No. A stretched template carries the old canvas, trim, bleed, and safe-zone relationships into a different product. Download the matching file and rebuild or reposition the artwork. This takes longer than resizing a document, but it gives the final design the correct geometry.
What should I check after exporting?
Check filename, page size, orientation, page count, bleed coverage, safe-zone distance, text, logos, image quality, and panel order. Open the exported file rather than relying on the editable document. Then upload the intended version and compare the free PDF proof with your source.
Do folds need their own template?
Yes. Folded pieces and envelopes use product-specific panel, flap, and fold information. A postcard guide cannot show those relationships. Use the correct folded-product file, keep artwork away from restricted areas, and verify panel order in the export and proof.
Choose the exact product template, place artwork by the boundaries, and inspect the export before proof.